Simple Chest of Drawer Plans
Build a simple iii-drawer DIY dresser with these detailed plans and tutorial. It makes great project for a beginner-woodworker.

PIN THIS TO PINTEREST
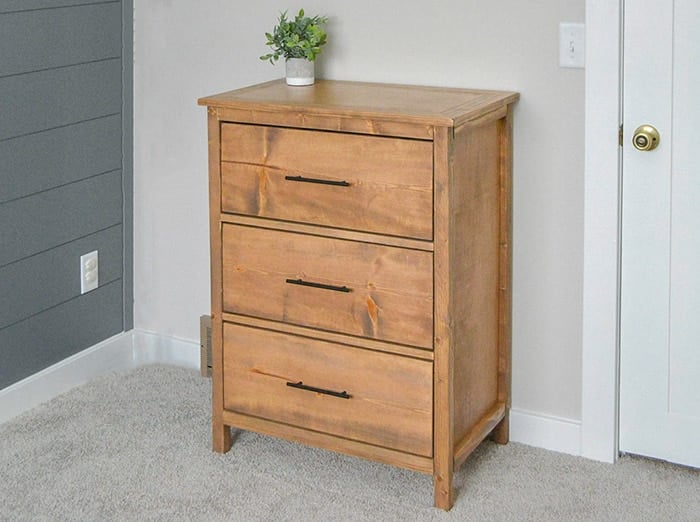
This simple unassuming dresser makes a cracking add-on to any fashion of room.
Tylynn from Bitterroot DIY idue south on a spree to renovate her habitation and she is tackling her son's room.
She completely overhauled his room from the accent wall to that door and now she is building all the furniture!
When she reached out to interact on this dresser, I was instantly drawn to the simplicity of it.
I hope it is a actually simple build and even if you lot are a beginner woodworker just getting started, you volition exist able to build it!
Materials needed –
- Lumber per the plans
- Miter Saw
- Kreg Jig. I apply a K4 but whatsoever Kreg Jig will piece of work too!
- Circular saw
- Kreg Rip cut
- Table Saw (optional)
- Forest glue
- 1¼" pocket hole screws
- Finish nailer and 1¼" finish nails
- 15" drawer slides – three pairs
Before we get started, brand sure to follow me on Instagram, YouTube, and Pinterest to keep up with all my latest builds and projects!
PIN THIS TO PINTEREST
Plans for the DIY Dresser –
This simple dresser uses basic boards and plywood which yous should be able to hands buy from your local abode comeback store.
You can get the plans past clicking below –
GET THE PRINTABLE PLANS
How to build the dresser
When you build this dresser, exist sure to use an anti-tip kit to proceed is safe and fastened to the wall.

Tylynn has the step by step pictures of her building the dresser. I outline the process below.
Step 1 – Brand Cuts
Cut the boards and the plywood per the plans.
See my tutorial on how to use a miter saw to accurately cut boards.
Cutting plywood –
I like to take larger sheets cut downward to a reasonable size at the store (most stores will do that for you). Usually, it is to get information technology to fit in the car because they aren't very authentic at the store.
At home, I use my circular saw with a Kreg Jig rip cut or a homemade directly edge jig to make smaller more authentic cuts. More details on that coming before long.
Of course, if you accept a table saw, yous can totally use that!
Step 2 – Build sides
Make pocket holes in the plywood and and attach to the ii×2 legs using pocket hole screws and woods mucilage to build the 2 sides.
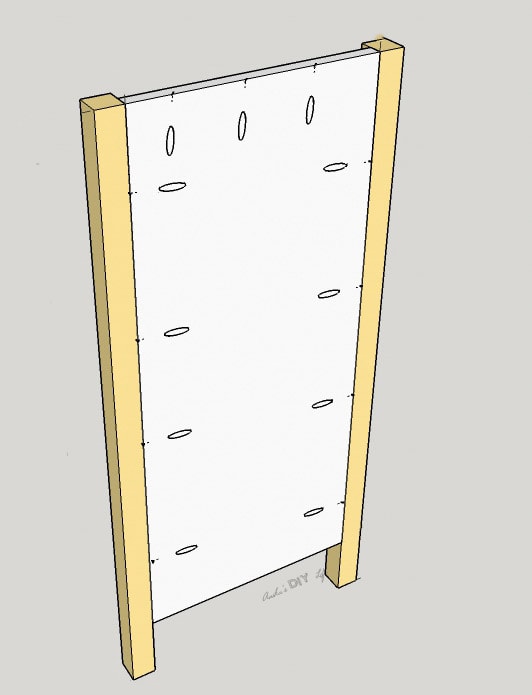
Attach trim to the sides using wood gum and finish nails.
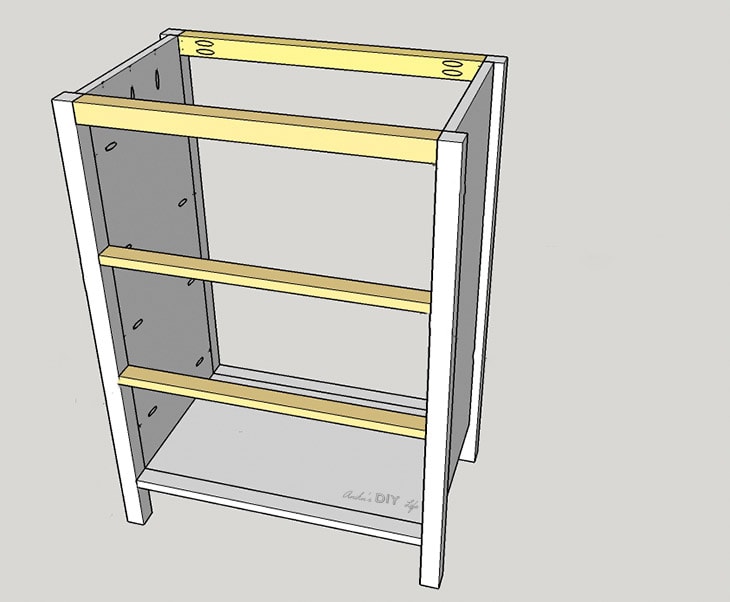
Step 3 – Add lesser
Build bottom using plywood and i×two and attach to both the sides.

Step 4 – Add rail and dividers
Adhere the 1×2 rails and drawer dividers between the two sides to build the carcass of the dresser.
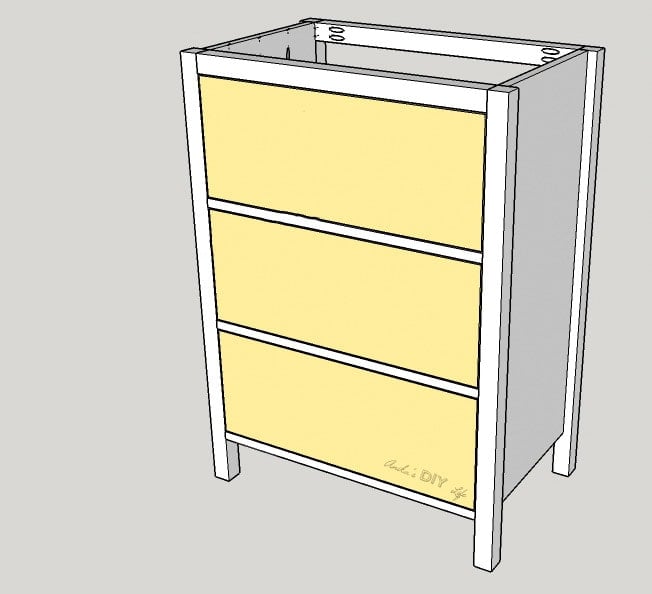
Step 5 – Build the drawers
Build the iii drawers equally per the plans and install them.
Nervous about edifice drawers ? Accept a look at my guide to building drawers for beginners.
Step 6 – Build and install top
Build the meridian using plywood and 1×2 boards and install by attaching with pocket hole screws and wood glue.
Of class, the pinnacle is installed with the drawers removed.
Step 7 – Finish
Paint or stain the dresser in the color of your choice.
If you decided to paint it, be sure to check out my guide to painting unfinished pino furniture to get long lasting results.
That's it!
Pivot THIS TO PINTEREST
Tylynn did an astonishing job on this dresser.
I love the stain colour she picked too!
Be sure to visit Tylynn's blog where she shows y'all all the steps to build this dresser and shares many more pictures.
GET THE PRINTABLE PLANS
If you are ready to build the dresser, get the plans to build it below!
Thanks' to Tylynn for collaborating on this projection. End by Tylynn's blog for all the building details and tips!
Happy edifice!
More than like this uncomplicated dresser –
- DIY uncomplicated nightstand
- DIY upholstered X-leg bench
- DIY nightstand with hidden storage
Instructions
- Cutting the boards and the plywood per the plans.
- Make pocket holes in the plywood and and attach to the 2x2 legs using pocket hole screws and wood glue to build the two sides.
- Attach trim to the sides using wood glue and terminate nails.
- Build bottom using plywood and 1x2 and attach to both the sides.
- Adhere the 1x2 rails and drawer dividers between the two sides to build the carcass of the dresser.
- Build the three drawers as per the plans and install them.
- Build the peak using plywood and 1x2 boards and install by attaching with pocket hole screws and woods mucilage.
- Paint or stain the dresser in the color of your choice and you're done!
Source: https://www.anikasdiylife.com/simple-diy-dresser-plans/
0 Response to "Simple Chest of Drawer Plans"
Post a Comment